Design for Recycled plastic
Designing for Recycled Plastic
Recycled plastic is a valuable and versatile material
This section is quite juicy, we have been designing products alongside the community for many years now and have learnt some valuable things about the properties of each type of plastic and which are best to use with our machines. The first thing to designing and producing great products is to be safe, be sure to memorise the information in the Safety & Fumes section to make sure you’re not exposing yourself or anyone else to hazardous fumes.
Pro-tip: focus on a single technique and master your product(s)!
Chapters
- Getting started
- Make it circular
- Designing for precious plastic machines
- Extrusion machine.
- Sheetpress
- Injection
- Library
Getting started
As we’ve covered in the Basics of Plastic, each type of plastic has different properties and will therefore behave in different ways. It’s important to get to know your chosen plastic well - this will take some time and testing (and patience, of course!)
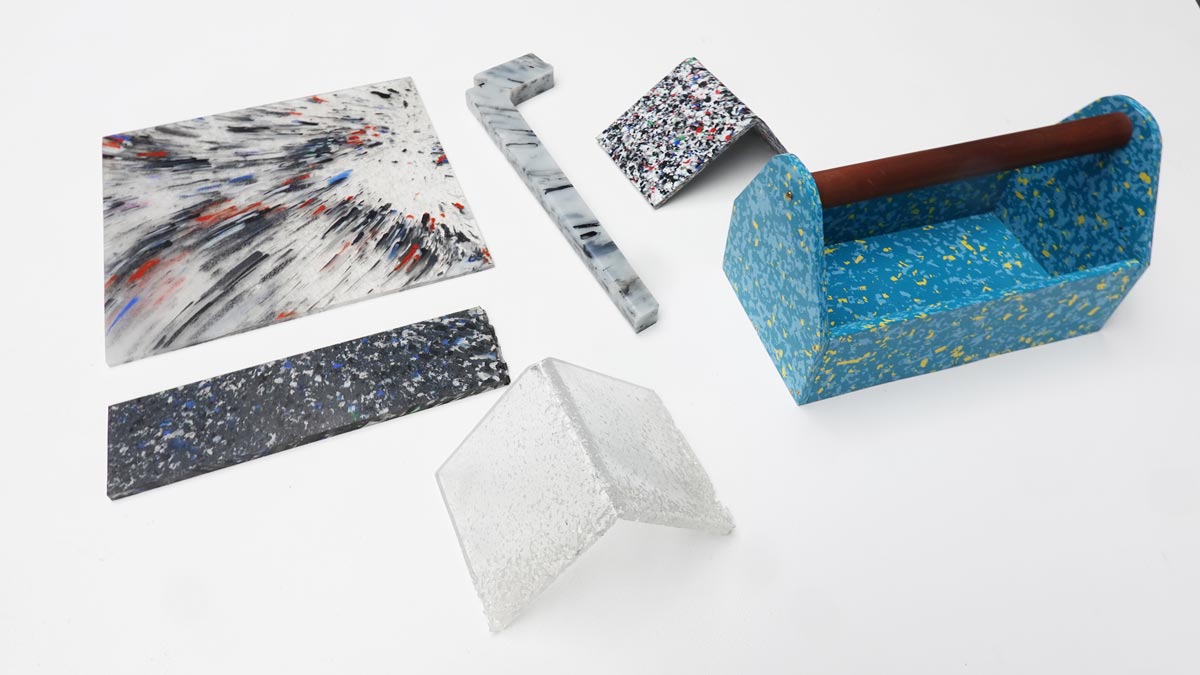
Compression is quite self explanatory, it compresses the shredded plastic or pellets together through heat and pressure often creating a little bit of flow but still showing the pellets initial shape. This can be achieved with a machine like our new Sheetpress, or the older Compression machine.
Products made with the sheetpress or compression machine:
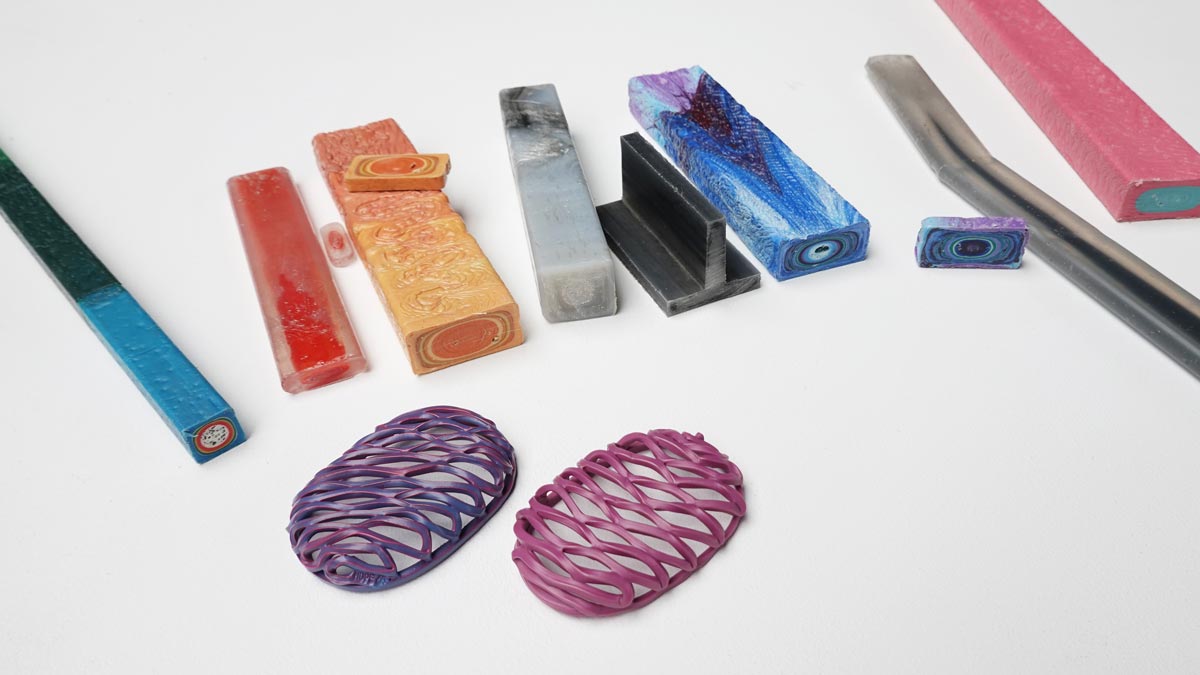
Extrusion “extrudes” the plastic through a hot metal barrel into a singular line of plastic, the plastic will be completely molten and the colours will be uniform.
Products made with the extrusion machine:
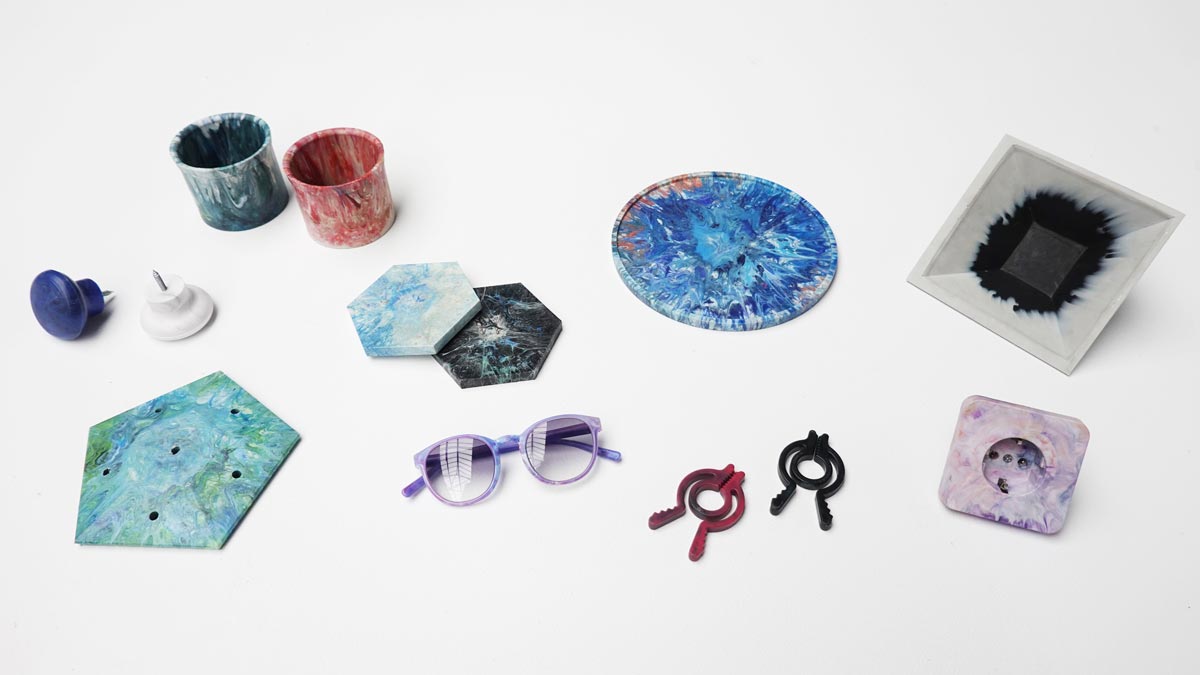
Injection also melts the plastic in another type of hot metal barrel, but this time into a mould. You can play with colour and texture with injection moulds depending on different types of techniques.
Products made with the injection machine:
Some guiding principles:
Recycling plastic is often a long and energy intense process what makes the material a very valuable resource. Here are some guiding principles you can follow through your design process and use as a check marks to know you are making the most out of this material:
Optimize the amount of material you use in your design, use thin but strong walls to make hollow pieces. Plastic can be really strong when formed into the right shape.
Be mindful of the steps involved in your production process: try to think strategically about the amount of time & energy involved in each step and design an efficient and productive manufacturing line, without compromising quality or sustainability.
In each production step there will always be by-products such as plastic dust, offcuts or residual material due to the nature of the process. Make sure to collect and carefully keep these clean and separated so you can reuse them in your own facility or sell/give them to other production facilities to properly handle them.
Last but not least try to enhance it’s unique aesthetic qualities: it’s important to produce well designed, well made and beautiful products so people will value them. Pay attention to detail and avoid making more cheap things that will easily be thrown out.
Make it circular
What does being “circular” mean?
Circularity is considering the entire life cycle of a product in the very beginning. It means designing products that are made up of recyclable materials and/or that can be clearly recycled (including disassembly and separation of materials). It means designing out waste and considering all materials to be sourced from or sent to other uses.
The linear model of take-make-use-waste
A transition to a circular economy is crucial to our survival on planet earth. Our current linear model means that resources are extracted from the earth, made into a product, and then thrown away, in a take-make-use-waste lifecycle. Let’s see how this works for plastic:
Take: oil from the earth through harmful extraction and huge amounts of energy
Make: plastic from additional harmful processes, producing toxic fumes and chemicals leaching into waterways, atmosphere and earth.
Use: 50% of the 300 million tonnes produced every year is single use. So this lifespan is anywhere from a few minutes to a few days.
Waste: used for a few minutes, commonly used plastics last at least 500 years before they start to break down.
The consequences of this economy are devastating, and so we need to think differently: where are the materials sourced from? what are the byproducts of production? what is the realistic lifespan of this new product? How can it be recycled, disassembled or reused? If you’re interested in this topic, Cradle to Cradle is an excellent book to read.
So, there’s a lot of material to work with 😉
Designing for Precious Plastic machines
In order to design great products you first need to understand the capabilities of each production method. We have outlined what we have learnt, but don’t be afraid to try new things, push the limits of your creativity and of course - share your findings with the Precious Plastic community!
The Extrusion machine
Extrusion is a continuous process where shredded plastic enters the hopper, is heated and pressed with a screw through a long barrel. The output is a steady line of plastic, and as this machine runs continuously, if you have enough plastic and a well-streamlined process you could (technically) be making products 24/7!
Pro-Tip: Extruding plastic will mix the plastic uniformly and will also create new colours. Darker colours will dominate - make sure to practise with different combinations.
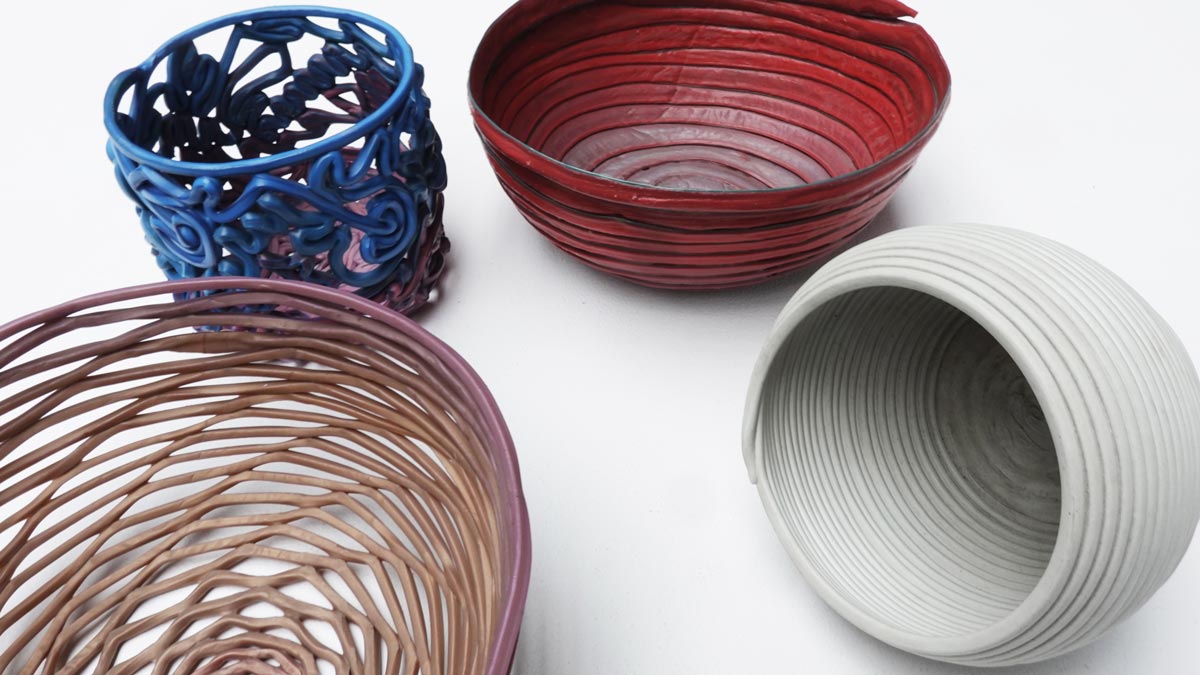
1. Weaving the filament
This technique creates cool products by rolling the filament around a shape or mould. This will take a lot of practise (trust us!) and you can create all sorts of bowls, vessels, lamps, or your own creation. You can control the shape of the filament by changing the nozzle - think about pushing pasta or Play-Doh through a mould, you could have squares, circles, diamonds, a mixture.. it’s up to you!
2. Beam making
This technique allows you to extrude solid plastic beams by attaching a metal mould to the nozzle and extruding the plastic into it. You can create beams of many different shapes and sizes - from small to big, and simple to more complex and either straight or with angles.
Moulds and techniques:
- Make a flat nozzle for the extrusion machine
- Extrude different textures
- Make a t-shape beam
- Make glasslike beams
- Extrude into a closed mould
- Make a quick release for the extrusion machine
Figuring out how the colour is extruded and hardens take a few experiments. Basically, as the plastic moves through the beam mould, it hardens as it touches the metal, and the following plastic will fill the middle of the beam. This means that the colour you put in first will create the surface of the beam.

Pro-tip: if you heat the mould first you can achieve a smooth surface. But note that this will often increase the cooling times can be very energy inefficient as it is constantly heating up and cooling down a piece of metal.
3. Using moulds
You can also fill in closed moulds, it’s faster and can fill up bigger volumes than the injection machine can. If you design with the strengths of each technique and you streamline your production process, you can produce a large amount of products very efficiently. For example the V4 Brick made with the extrusion machine and a mould is designed hollow which reduces the amount of material without compromising the strength of the object - this lowers the amount of material needed allowing you to make more with less, as well as cuts production time and transportation due to weight. Win!
These are the type of design decisions you would consider before you go into production - circularity, efficiency and cost. Don’t forget to include all stages of production when assessing your product design - cooling times, demoulding processes and how much time to reattach a mould are examples of different variables.

Products:
- Make extruded plastic bricks
- Build brick structures
- Make a bench with beams
- Make a lamp with beams
- Create an extruded lamp
The Sheetpress
This machine creates sheets up to 1 x 1 metre with a range of thicknesses between 6mm - 30mm. When making a sheet mould there are many different configurations of size, thickness and surface finish. Do your research, read through different projects and check out the products on the Bazar before investing in the best mould that will fit your needs. Some different methods are:
- Cut plastic jigsaw
- Drill and screw through plastic
- Cut plastic with the table saw
- Make your sheet shiny
- Bend plastic sheets
There are different ways of processing plastic sheets to create final products. Here we go over two of our most common techniques:
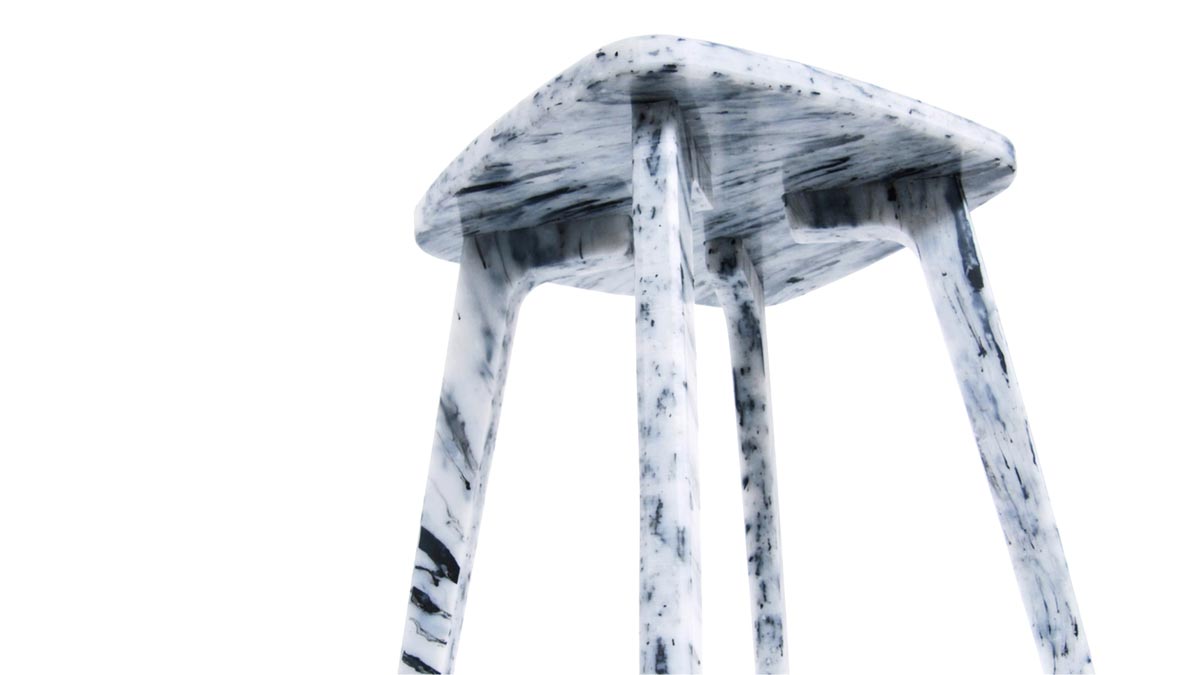
1. Cutting and woodworking techniques
Cutting is the most common process and there are a number of different methods - you can use regular woodworking tools such as a jigsaw or table saw or more advanced methods like CNC milling.
- HDPE and PP are easiest to cut and use
- Having a clean cut is a matter of finding the right tool and blade
- Air cooling will help if you have access to it
- Cutting will produce a lot of offcuts, make sure to collect this and reuse
- Snap fit joints works really well on plastic
Note: if you’re using large cuts of plastic make sure to get familiar with the material and how it sags and bends across bigger areas. It can be very flexible and the more you know about it’s properties the more you can amplify it’s qualities.
2. Bending
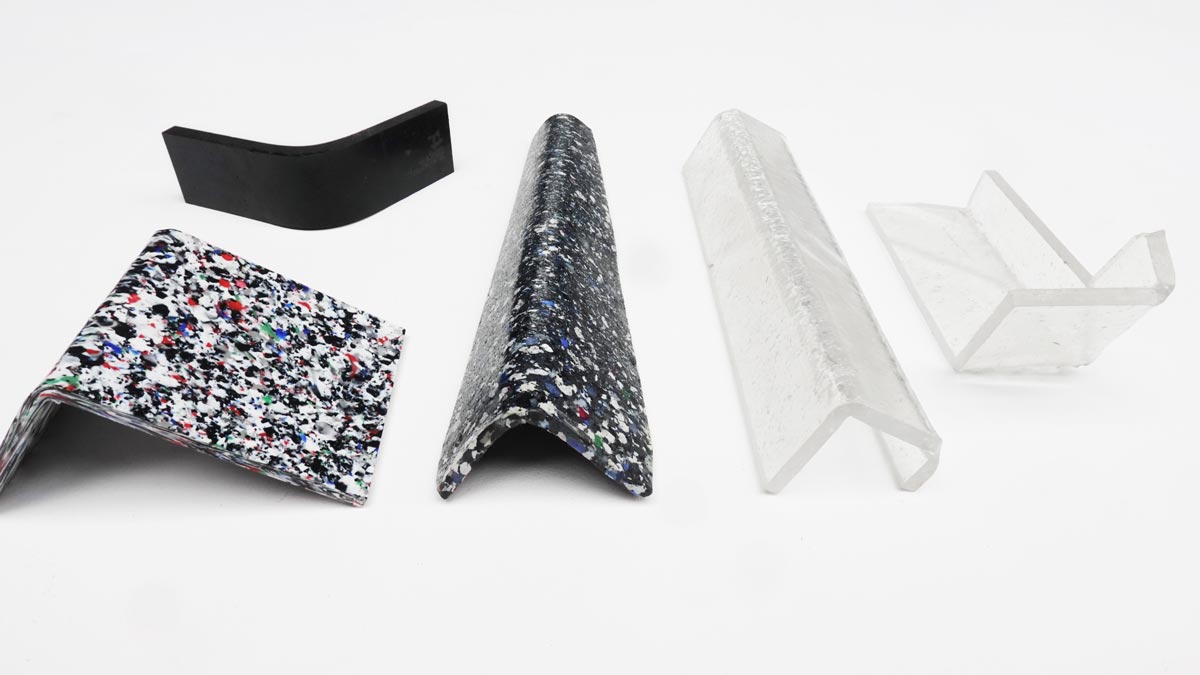
This is quite fun! By applying the right temperature for a period of time you can mould and bend a sheet and turn it into a three-dimensional shape. The most important thing to get right is the temperature - this defines how fast and evenly the heat will spread through the sheet. It will be affected by the type of plastic, the size of the bend and the thickness of the sheet.
- Fast heat will guarantee the heat spreads evenly allowing for a nice and easy bend. If it’s too slow, it can burn on the outside before the heat reaches the inner layers, ending up in an uneven surface and cracks/white marks along the bend.
- Thinner sheets up to 6-8mm are easier to bend
- Above 6-8mm we recommend using double sided heat to reach the middle fast enough for a clean bend. This technique works well with PS but is harder when working with PP, LDPE or HDPE.
- You can use line benders, there are many DIY options online using Nichrome wire for sheets under 6mm. For above you’ll need thick strings and double sided heat is highly recommended. You could also use heated blade benders for HDPE and PP.
- A less efficient option for smaller bends is heating the full piece in an oven and forming it with a two sided mould - it can be fast but restrictive due to the size of the oven.
Products:
The Injection machine
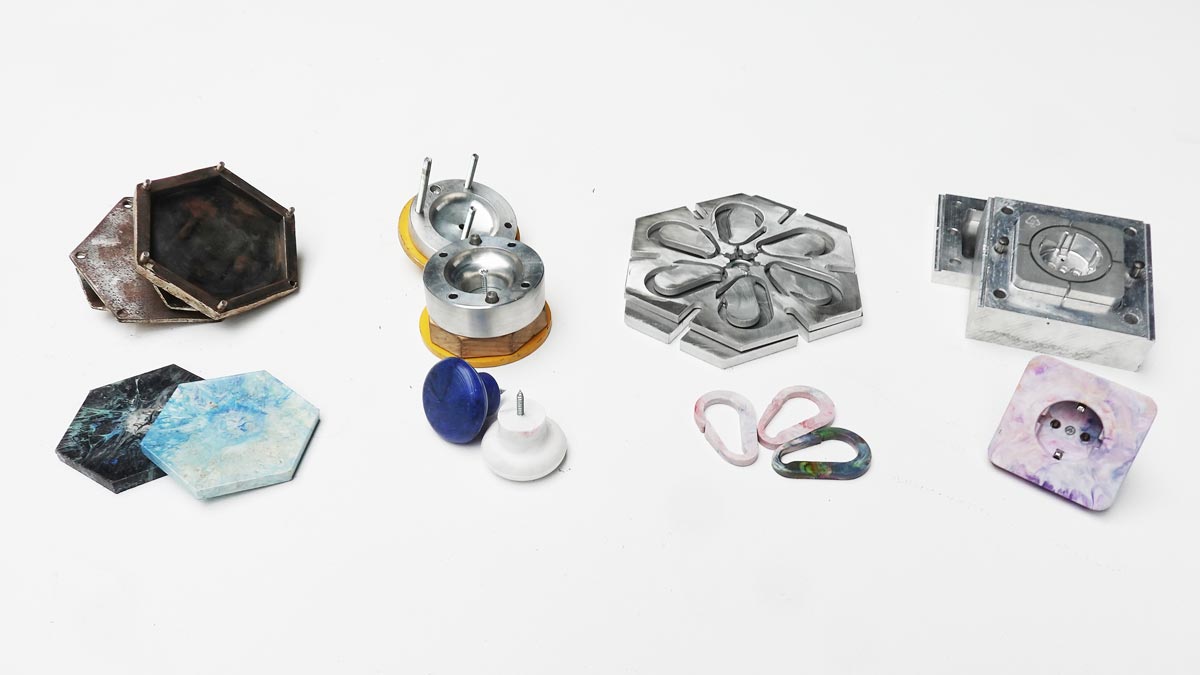
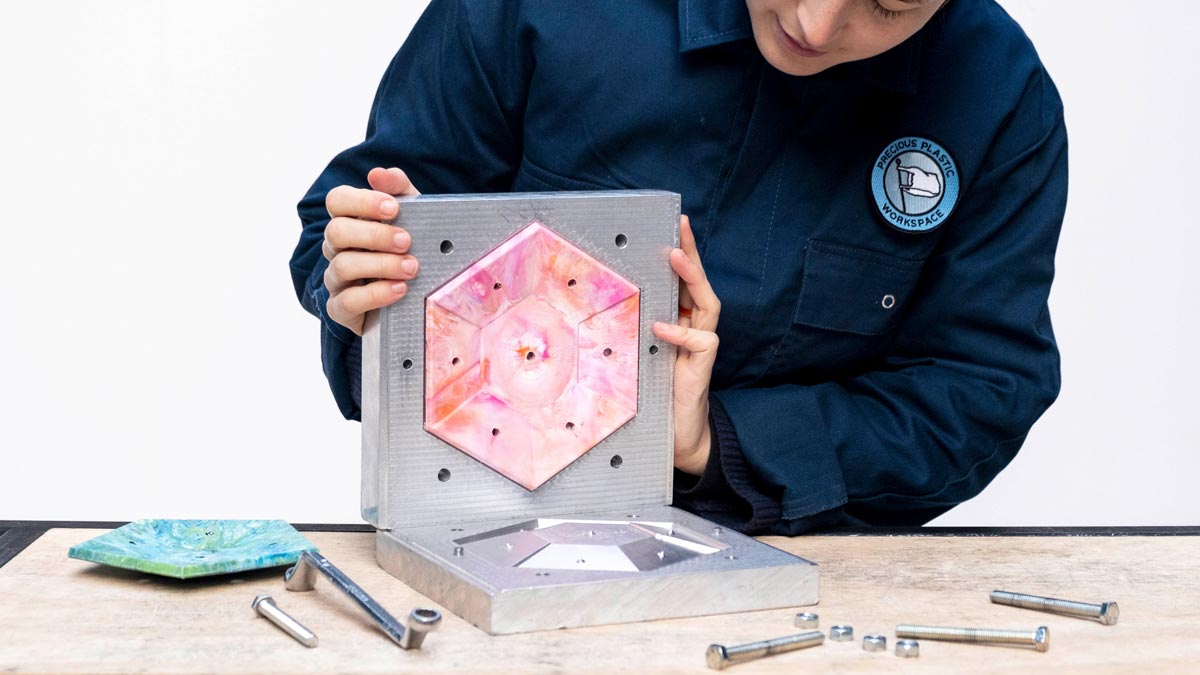
The Injection machine is a very simple concept, it heats the plastic and with pressure fills a mould. You can create really beautiful and well finished objects, and if your mould is well made then you can keep a consistent high quality across your production. It can also be very quick and easy to grasp for your customers or if you’re holding a workshop - you can fill plastic into the hopper, it is heated and fills the mould and then cooled and voilá! The product is finished for people to see and hand around.
This machine will allow you to be versatile with your production because all you have to do is screw on another mould and you can be making a completely different product. Be sure to check out the Moulds section on the left to learn more about the different methods.
Pro-tip: the injection machine is a perfect companion for a workshop as it is capable of turning waste into a valuable product within minutes and people/customers can really grasp the value of your process and product quickly.
Techniques:
Products:
- Make a carabiner CNC vs laser cut
- Make a lightswitch and socket
- Make an interlocking brick
- Make a handplane - simple mould
- Make a broom hanger
Note: make sure to know the total amount of plastic that can fit in the barrel - this will limit the volume of the final product. It is usually around 150cm3 - this is quite small. It's not a problem, just a design constraint!
Library
When designing products to be produced with the Precious Plastic machines, your best resource will be the library! You’ll find product designs, techniques and hacks, some from us and many are from the community. You can also check in on Questions because when (not if 😉) you get stuck, it’s very likely someone else has come across the same problem! If you come up with a super cool new product, hack or technique, create your own projects so we can all benefit from your awesome knowledge.
Are you interested to connect with the Precious Plastic community? Perhaps you want to learn more or share your own knowledge. Well you're in luck! We have created a Questions section for the community to collaborate. Now if you want to chat with people locally and globally, check out the Discord